2. Quick start
Create POST /person-query to receive a person ID, execute a SQL query, and return the matching database record. The Spring Boot + JDBC example provides the complete configuration, with H2 databases, a login page, the Dataway console, and Swagger UI.
To store metadata in Nacos, use the separate Spring Boot + Nacos example. The API publishing and calling steps are the same.
Configure the project
Add Dataway
Add the framework integration, JDBC metadata store, and SQL extension to a Spring Boot MVC project:
- Maven
- Gradle
<!-- Spring integration -->
<dependency>
    <groupId>net.hasor</groupId>
    <artifactId>dataway-spring</artifactId>
    <version>5.0.0</version>
</dependency>
<!-- Stores API definitions and releases -->
<dependency>
    <groupId>net.hasor</groupId>
    <artifactId>dataway-meta-jdbc</artifactId>
    <version>5.0.0</version>
</dependency>
<!-- SQL execution -->
<dependency>
    <groupId>net.hasor</groupId>
    <artifactId>dataql-sqlproc</artifactId>
    <version>5.0.0</version>
</dependency>
// Spring integration
implementation 'net.hasor:dataway-spring:5.0.0'
// Stores API definitions and releases
implementation 'net.hasor:dataway-meta-jdbc:5.0.0'
// SQL execution
implementation 'net.hasor:dataql-sqlproc:5.0.0'
Core configuration
The three core beans from DatawayConfiguration are:
// Configures identity lookup, SQL connections, and script transactions.
@Bean
public DatawayConfig datawayConfig(IdentityProvider identityProvider,
        ConnectionProvider connections) {
    return new DatawayConfig()
            .identityProvider(identityProvider)
            .attachment(ConnectionProvider.class, connections);
}

// Supplies the current user identity for permission checks.
@Bean
public IdentityProvider identityProvider() {
    return new RequestIdentityProvider(LoginInterceptor.IDENTITY_ATTRIBUTE);
}

// Uses Spring connections and transaction management for SQL and transaction functions.
@Bean
public ConnectionProvider connectionProvider(ApplicationContext context) {
    return new SpringTransactionProvider(context);
}
dataway:
  # Enable API access
  api-enabled: true
  # Enable the management console
  admin-enabled: true
  # Enable API documentation
  docs-enabled: true
Publish an API
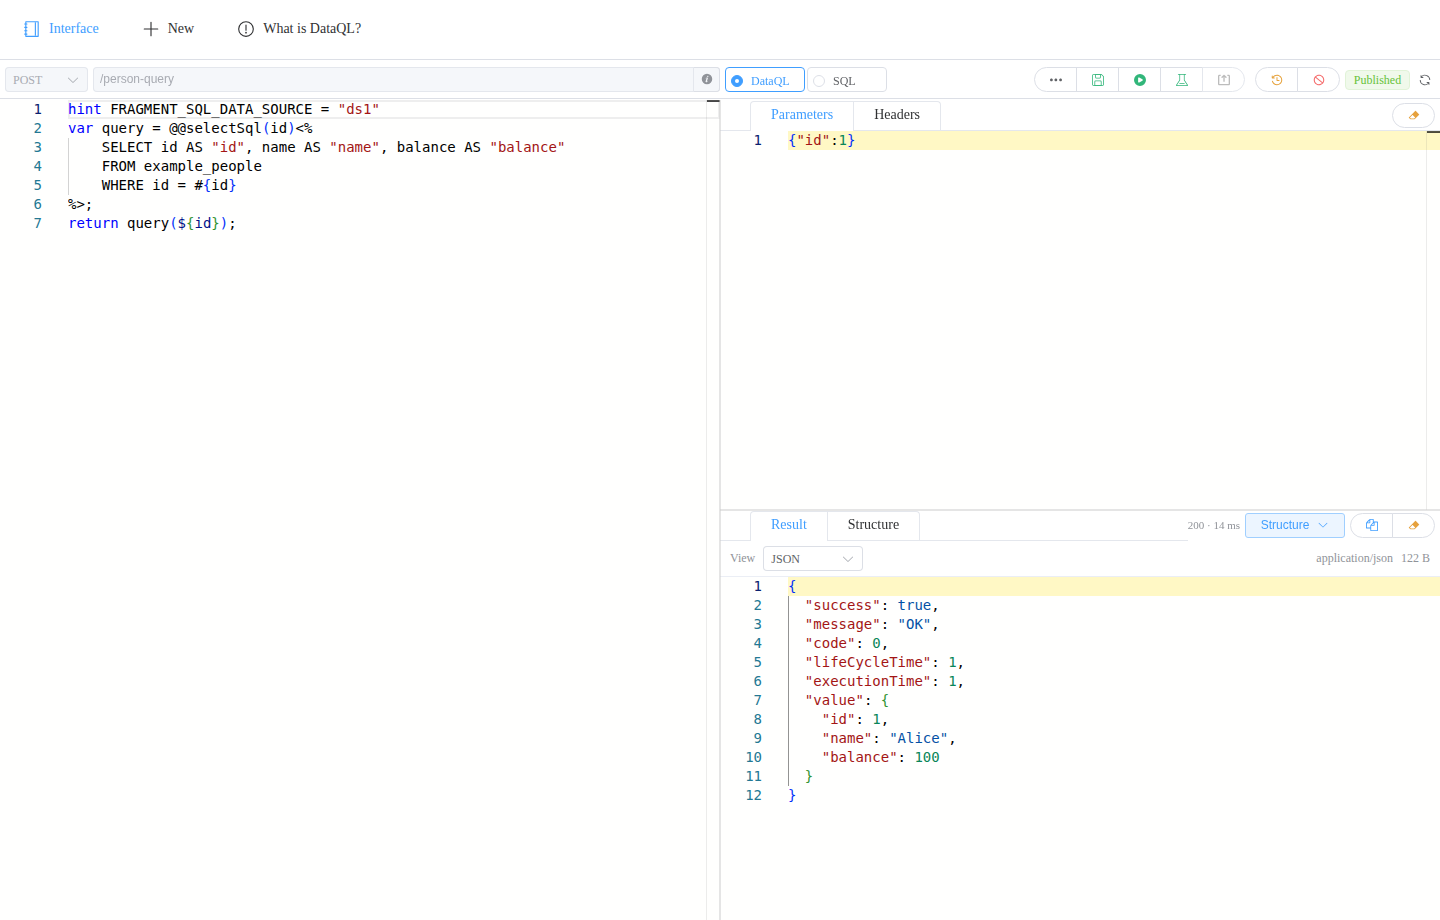
Create an endpoint
Start the application, open http://127.0.0.1:8080/, and sign in with admin / example-password. Select 管理控制台 (management console), then New:
- Select
POSTas the method. - Enter
/person-queryas the path. - Select
DataQLas the script type.
Enter this script in the left editor:
hint FRAGMENT_SQL_DATA_SOURCE = "ds1"
var query = @@selectSql(id)<%
    SELECT id AS "id", name AS "name", balance AS "balance"
    FROM example_people
    WHERE id = #{id}
%>;
return query(${id});
The script selects ds1 and binds the request's id to SQL parameter #{id}.
Debug the endpoint
Enter the request in Parameters on the right:
{
  "id": 1
}
Select Execute Query to debug the current script and see Alice's record in Result at the bottom right. Change id to 2 and run again to see Bob's record.
Save and publish
Select Save → Smoke Test → Publish. The API becomes callable when its status is Published.
Call the API
The published endpoint is http://127.0.0.1:8080/api/person-query. /api is the API entry prefix.
From the browser
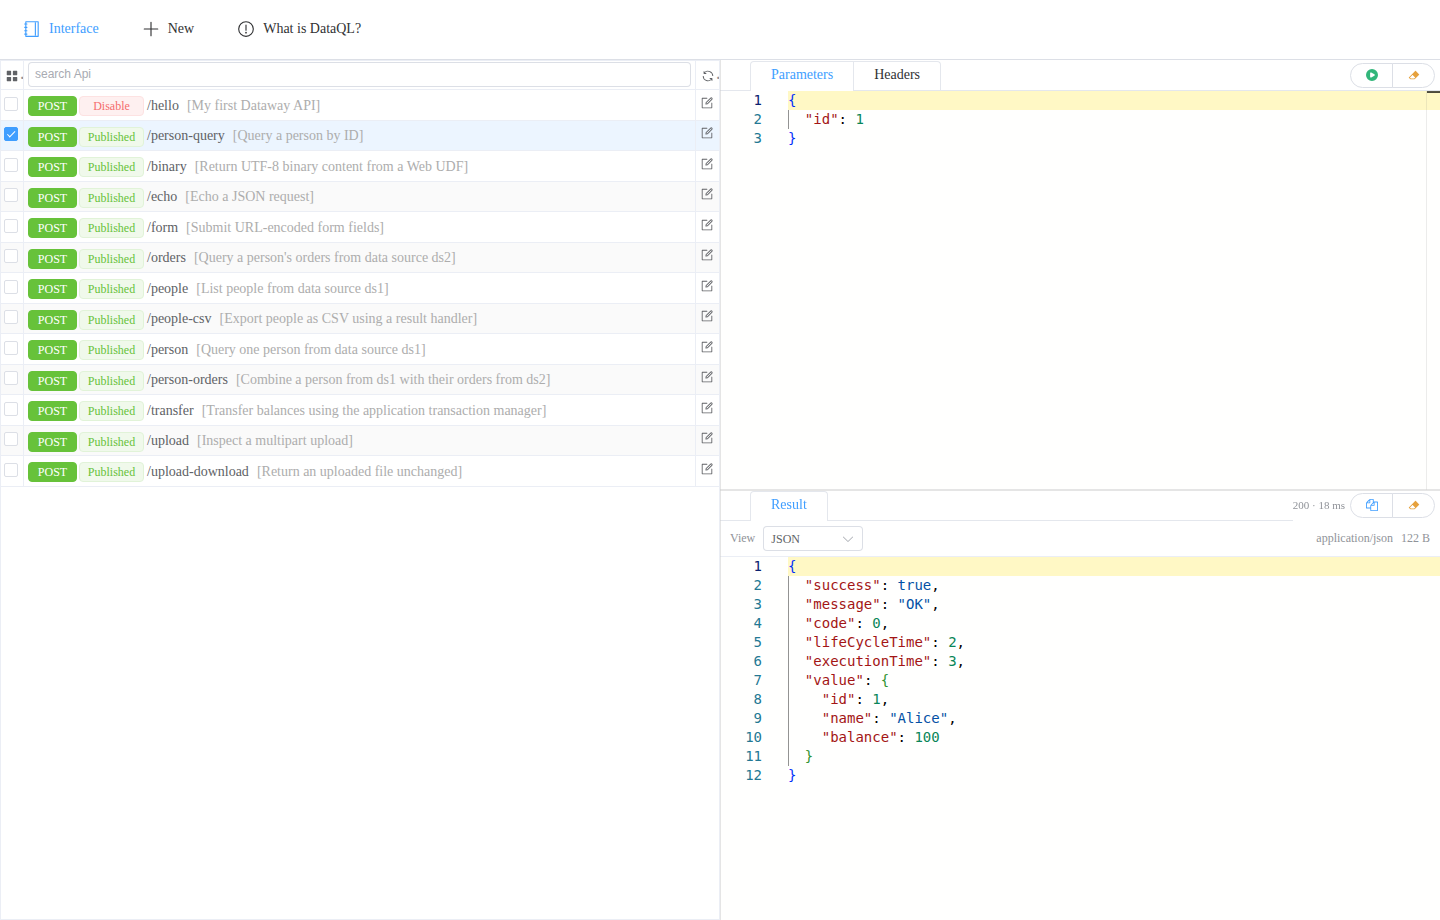
Select Interface at the top of Dataway UI to open the endpoint list:
- Select the published POST /person-query.
- Enter
{"id": 1}in Parameters on the right. - Select Execute Query and check the HTTP status and Alice's record in Result below.
Over HTTP
- curl
- JavaScript
# Sign in to the example application and save its cookie.
curl -c cookies.txt -X POST http://127.0.0.1:8080/session/login \
  -d 'username=admin&password=example-password'

# Call the published endpoint.
curl -b cookies.txt http://127.0.0.1:8080/api/person-query \
  -H 'Content-Type: application/json' \
  -d '{"id":1}'
// Run on the signed-in example page to reuse its login cookie.
const response = await fetch('/api/person-query', {
    method: 'POST',
    credentials: 'same-origin',
    headers: {'Content-Type': 'application/json'},
    body: JSON.stringify({id: 1})
});
if (!response.ok) {
    throw new Error(`HTTP ${response.status}`);
}
const result = await response.json();
console.log(result);
The default response is structured:
{
  "success": true,
  "message": "OK",
  "code": 0,
  "lifeCycleTime": 2,
  "executionTime": 1,
  "value": {
    "id": 1,
    "name": "Alice",
    "balance": 100
  }
}
Timings are in milliseconds and vary between calls. Change id to 2 and call again to receive Bob's record.
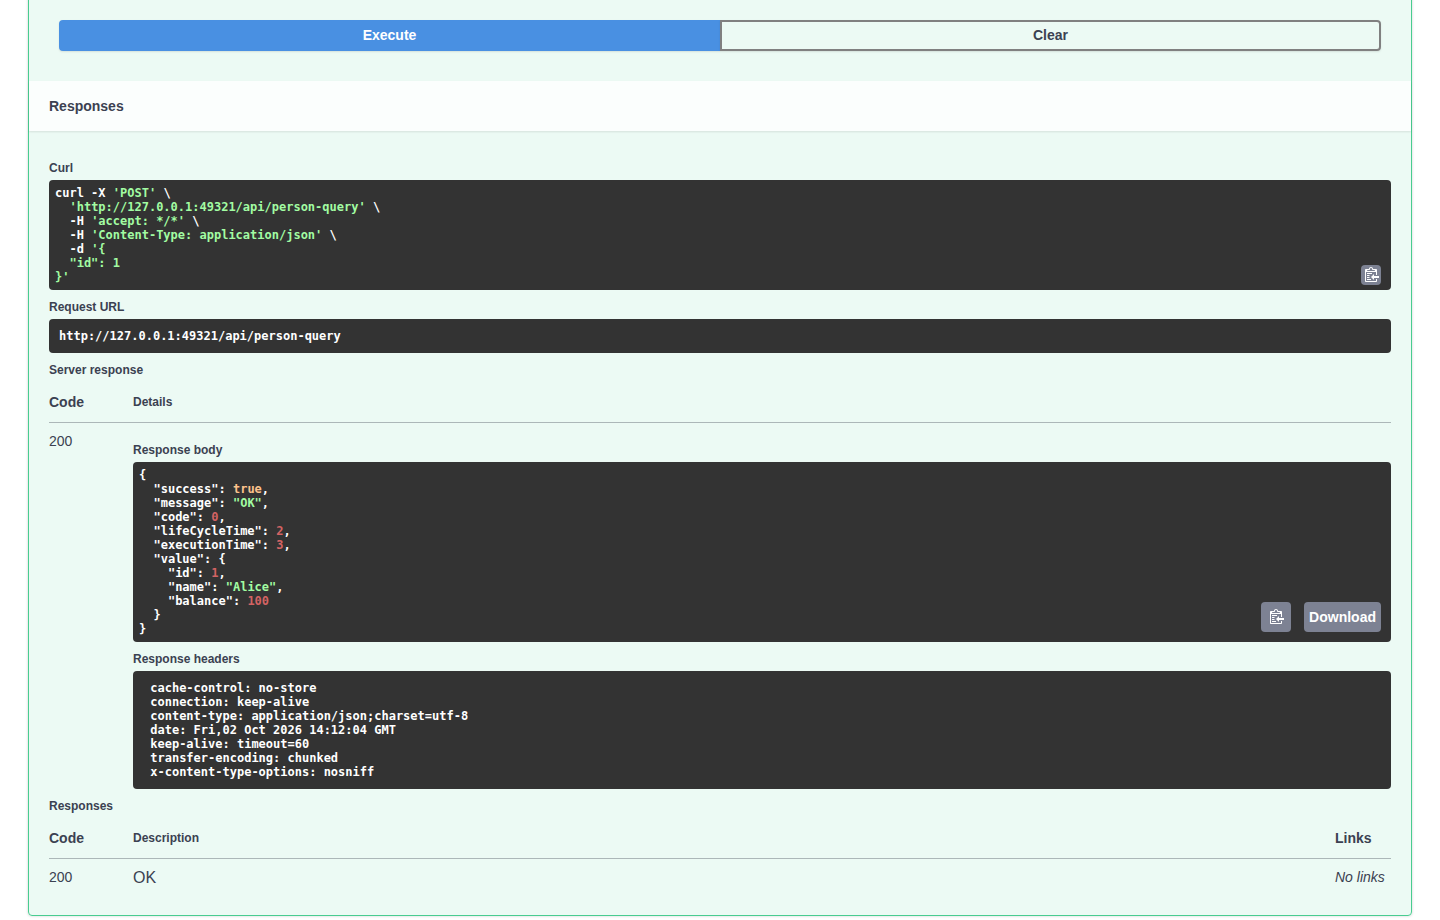
SwaggerUI
While signed in, open the example's http://127.0.0.1:8080/swagger/index.html. Swagger UI reuses the login cookie.
- Expand POST /person-query and select Try it out.
- Enter
{"id": 1}in Request body. - Select Execute and check the status and body under Server response.